When you start developing Android apps your main target will always be delivering a working application. But when your application became bigger it also became harder to test. You will lose your confidence that the functionality you added didn’t affect any other part.
At this point you start to think if there is something that can help you be confident that any added new features doesn’t break your app. The answer is Testing.
Test code is just as important as production code. It is not a second-class citizen. It requires thought, design, and care. It must be kept as clean as production code.
– Robert C. Martin, Clean Code
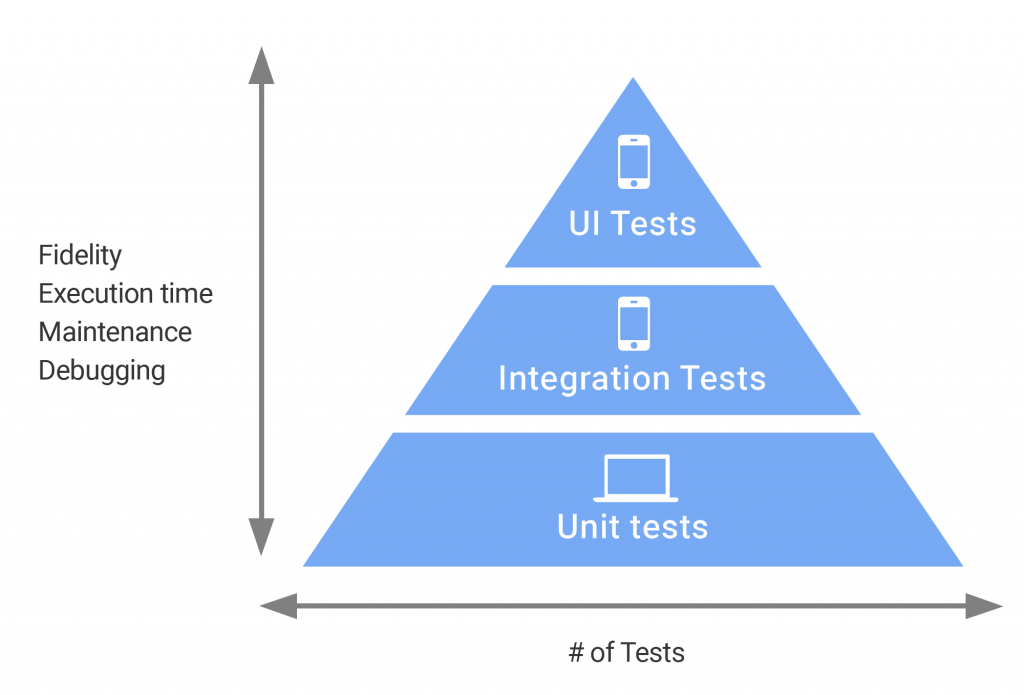
Testing is divided into 3 categories:
1. Unit tests:
- Small tests that validate your app’s behavior by testing one class per time.
- Testing of units of code.
- Each unit test tests specific feature.
- Requires JVM environment
2. Integration tests:
- Medium tests that validate interactions between levels of the stack within a module, or interactions between related modules.
- Testing of how pieces being put together
- Tests application behavior
- Often involves testing of UI
- Requires Android environment (emulator/physical device)
3. UI tests:
- Large tests that validate user journeys spanning multiple modules of your app.
- Slower and are less isolated so are not run as often and can be more flaky than integration and unit tests.
- Requires Android environment (emulator/physical device)
We will be talking about Unit Tests, and how to make sure that your logic do what should be done.
You will find the unit tests at the test folder, Each unit test is a separate method annotated with @Test. This for example is asserting that 2+2 = 4. Assert used to indicate expected results. And fails test when expectation not met.
class ExampleUnitTest {
    @Test
    fun addition_isCorrect() {
        assertEquals(4, 2 + 2)
    }
}
Tests grouped in classes for organization convenience and that allows execution grouping, and setup/teardown grouping.
There are times when we need to run specific operations before/after each test, Thus we can use @Before and @After annotations.
@Before
fun setUp() {
    // Test pre-processing (for ex. initialization)
}
@After
fun tearDown() {
    // Test post-processing (for ex. reset values)
}
And If you need to run operations once per class before/after all tests you have @BeforeClass, and @AfterClass annotations.
Tests preserve and enhance the flexibility, maintainability, and reusability of the production code. If you let the tests rot, then your code will rot too. Keep your tests clean.
– Robert C. Martin, Clean Code
References:
- Clean Code [CH 9: Unit Tests]
- https://developer.android.com/training/testing
- https://codelabs.developers.google.com/codelabs/android-testing